
Eigenlayer restaking pools are revolutionizing how Ethereum stakers maximize capital efficiency and boost network security. By enabling users to repurpose staked ETH or liquid staking tokens (LSTs) for additional rewards, EigenLayer has become a critical layer in the evolving Ethereum staking landscape. This step-by-step guide breaks down the essential actions needed to participate effectively, whether you’re a novice or an experienced validator.
1. Verify Eligibility and Prepare an Ethereum Wallet
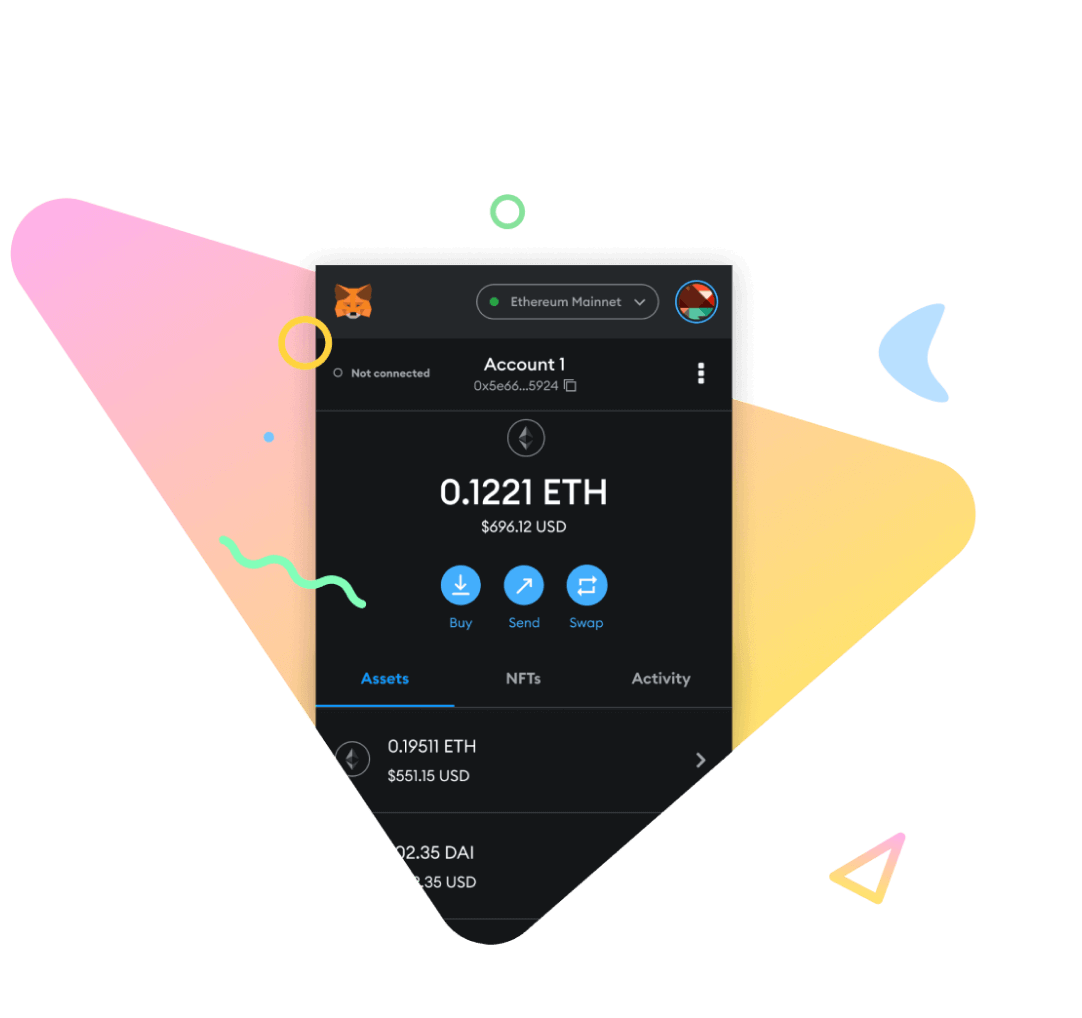
The first step in joining Eigenlayer restaking pools is ensuring you meet eligibility requirements. In most cases, this means having access to a non-custodial Ethereum wallet such as MetaMask, Ledger, or another Web3-compatible solution. Centralized exchanges like Crypto. com and Kraken also offer streamlined restaking options for eligible users with verified accounts. However, for full control and direct interaction with EigenLayer’s smart contracts, a self-custodied wallet is recommended.
Security tip: Always verify that your wallet is updated and backed up before connecting it to any DeFi protocol.
2. Acquire ETH or Supported Liquid Staking Tokens (LSTs)
Next, you’ll need either native ETH for validator-based (native) restaking or supported LSTs such as stETH (Lido), rETH (Rocket Pool), or cbETH (Coinbase). These tokens represent staked ETH with built-in liquidity and can be acquired via decentralized exchanges (DEXs), directly through staking protocols, or centralized platforms offering integrated staking products.
If you already run an Ethereum validator node, ensure your staked ETH is eligible for native restaking by reviewing withdrawal credentials and node configurations. For most users interested in liquid restaking, simply hold enough LSTs in your connected wallet to participate.
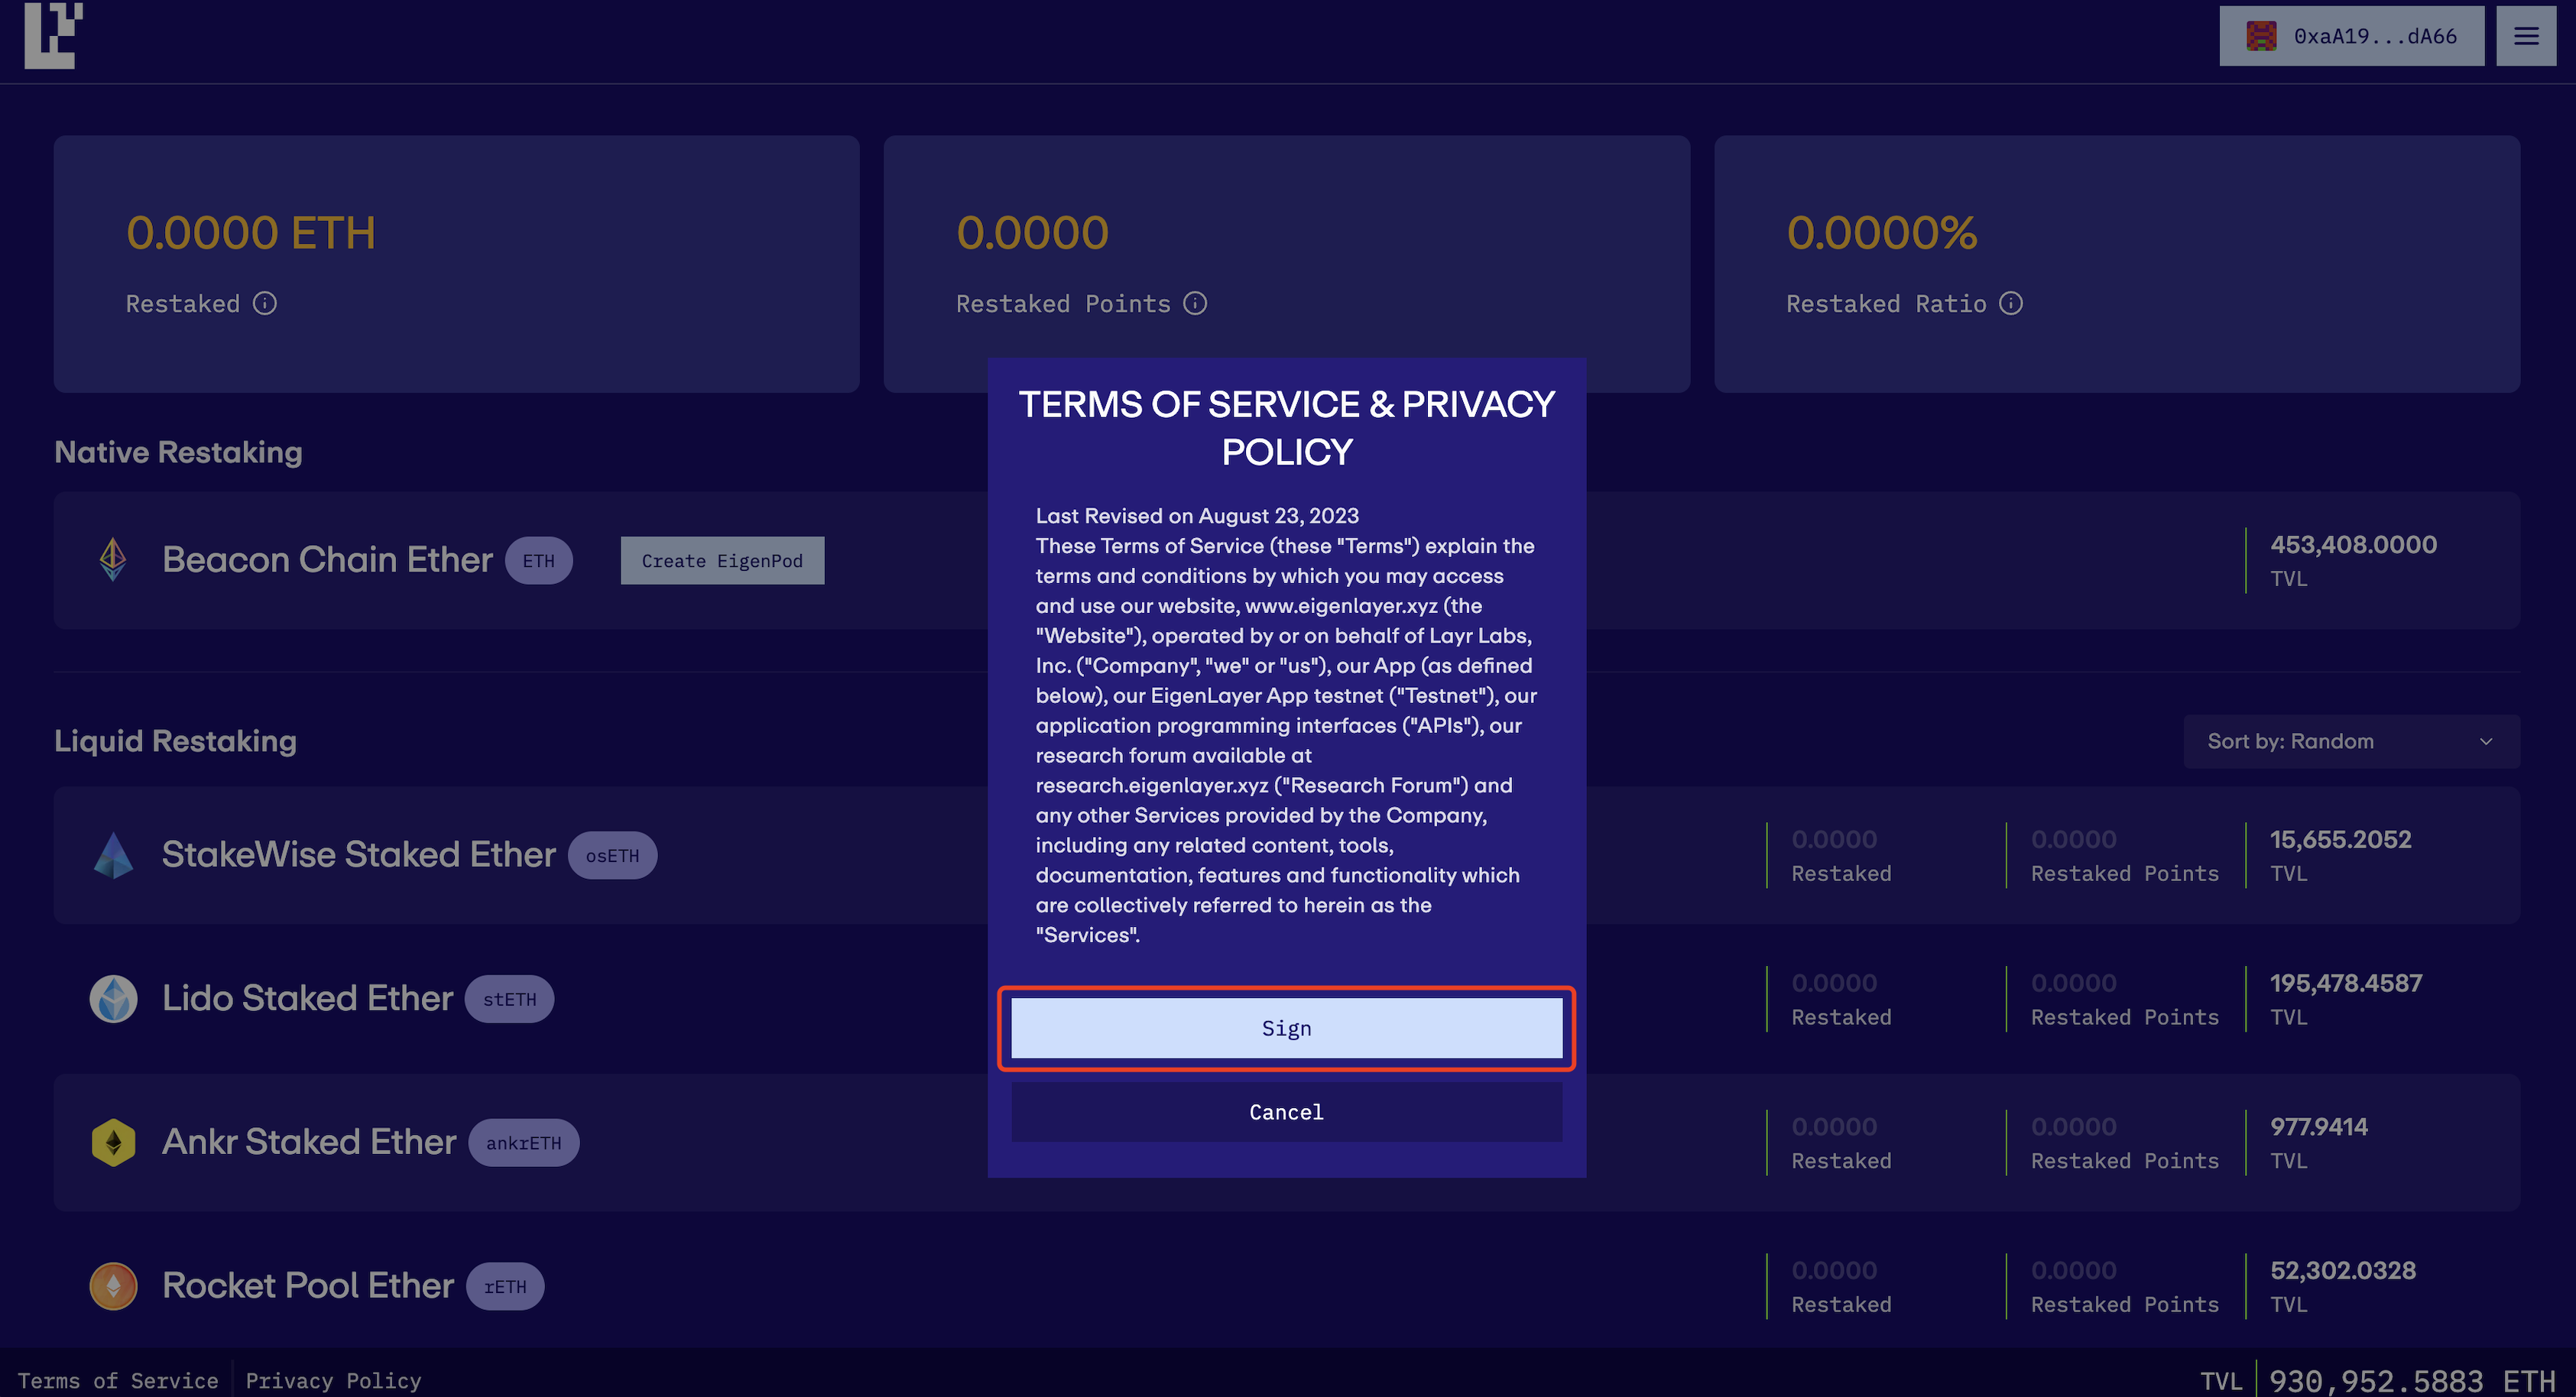
3. Connect Your Wallet to the EigenLayer Interface
Once you have your assets ready, navigate to the EigenLayer Web App. Use your preferred Web3 wallet to connect securely. The interface will automatically detect supported tokens in your balance and display available restaking options.
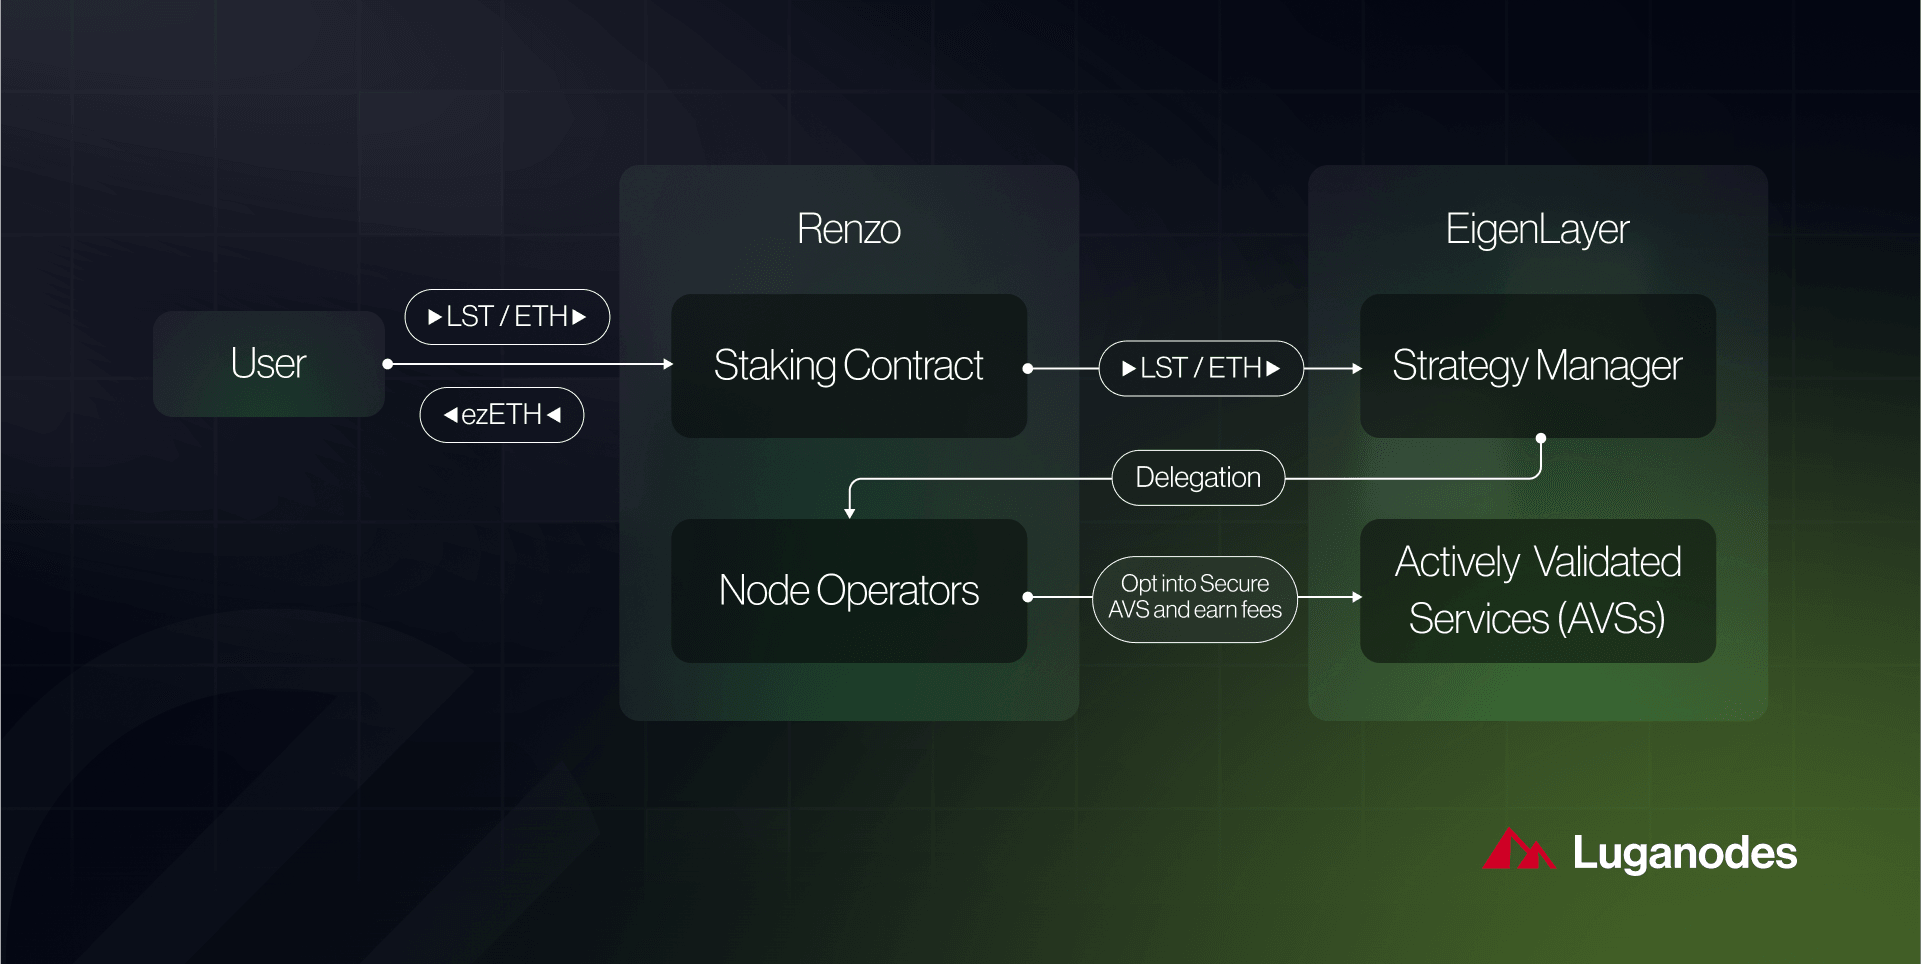
This connection step is crucial - it enables smart contract interactions required for both depositing assets into pools and delegating them to network operators who validate Actively Validated Services (AVSs).
Step-by-Step: Join EigenLayer Restaking Pools
- Verify Eligibility and Prepare an Ethereum WalletEnsure you meet EigenLayer’s eligibility requirements and set up a secure, compatible Web3 wallet such as MetaMask, Ledger, or Coinbase Wallet. This wallet will be used to interact with the EigenLayer app and manage your assets.
- Acquire ETH or Supported Liquid Staking Tokens (LSTs)Purchase ETH or supported LSTs like stETH (Lido), rETH (Rocket Pool), or cbETH (Coinbase) via reputable exchanges such as Crypto.com, Kraken, or Coinbase. These assets are required for restaking in EigenLayer pools.

- Connect Your Wallet to the EigenLayer InterfaceGo to the EigenLayer Web App and securely connect your wallet. This enables you to interact with the protocol and access restaking features.
- Select and Deposit into a Restaking PoolChoose your preferred restaking method: deposit LSTs for liquid restaking or, for advanced users, link your validator for native restaking. Follow the prompts to deposit your assets into a chosen pool and confirm the transaction on-chain.
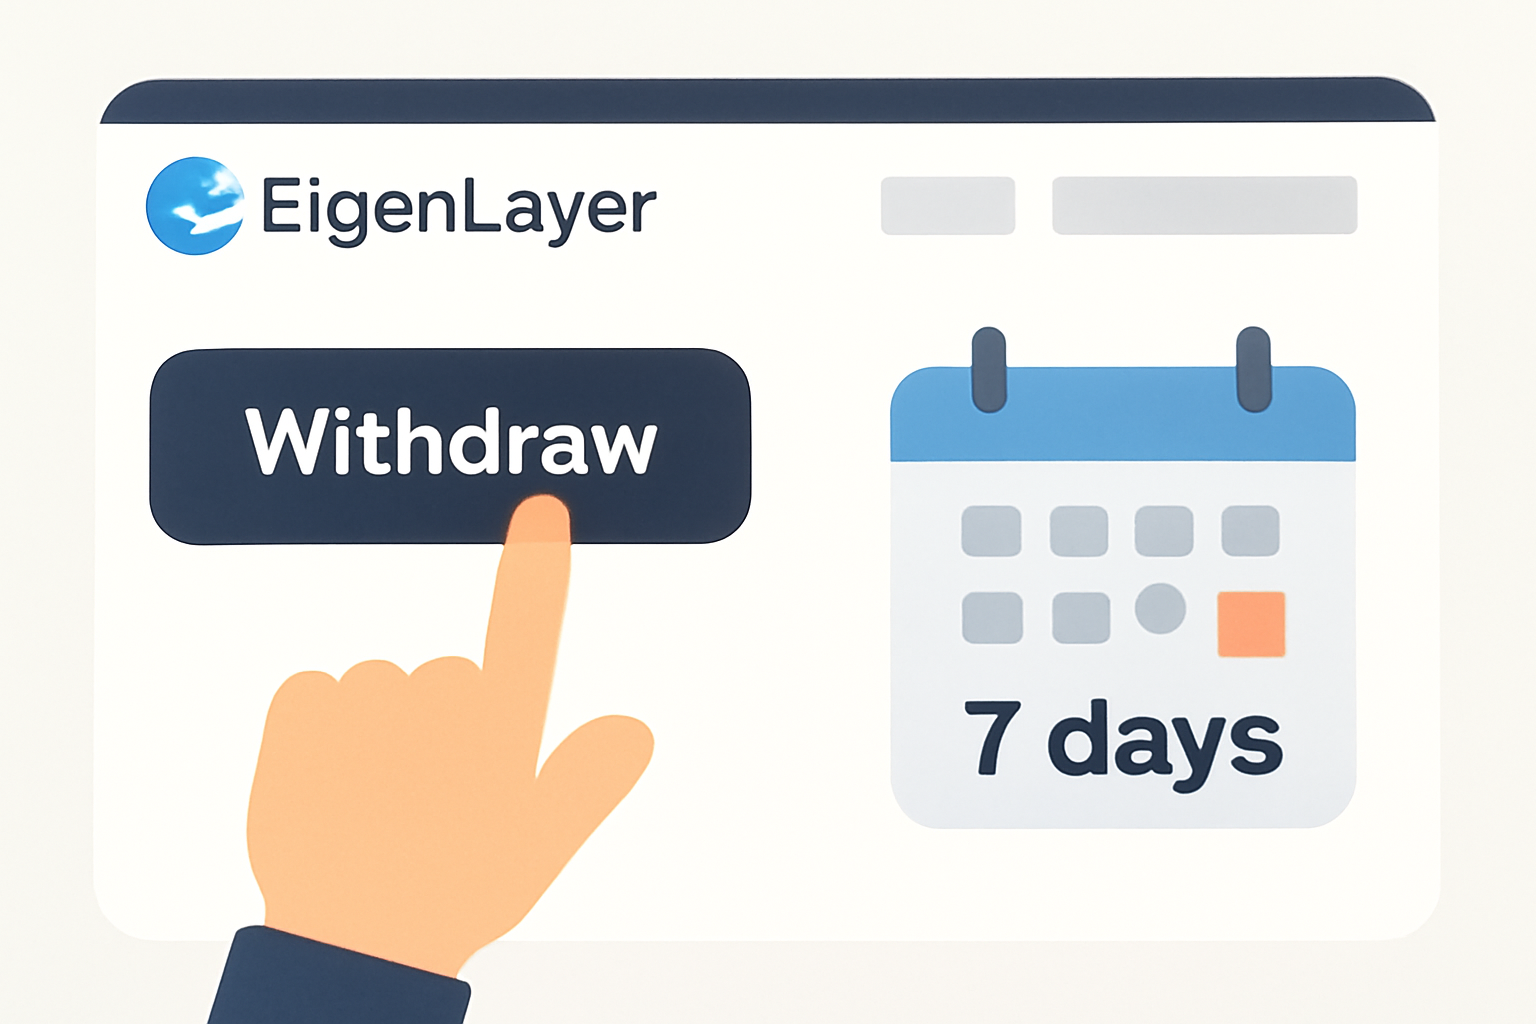
- Monitor Rewards and Manage Restaked AssetsTrack your accrued restaked points and rewards directly in the EigenLayer dashboard. You can also manage withdrawals (noting the 7-day delay) and re-delegate to different operators to optimize returns.

Selecting Between Liquid and Native Restaking
Your choice between liquid and native methods depends on your technical expertise and risk tolerance:
- Liquid Restaking: Deposit LSTs directly into smart contracts; ideal for users seeking flexibility without running nodes.
- Native Restaking: Requires operating an Ethereum validator node; offers deeper protocol integration but involves more setup.
4. Select and Deposit into a Restaking Pool
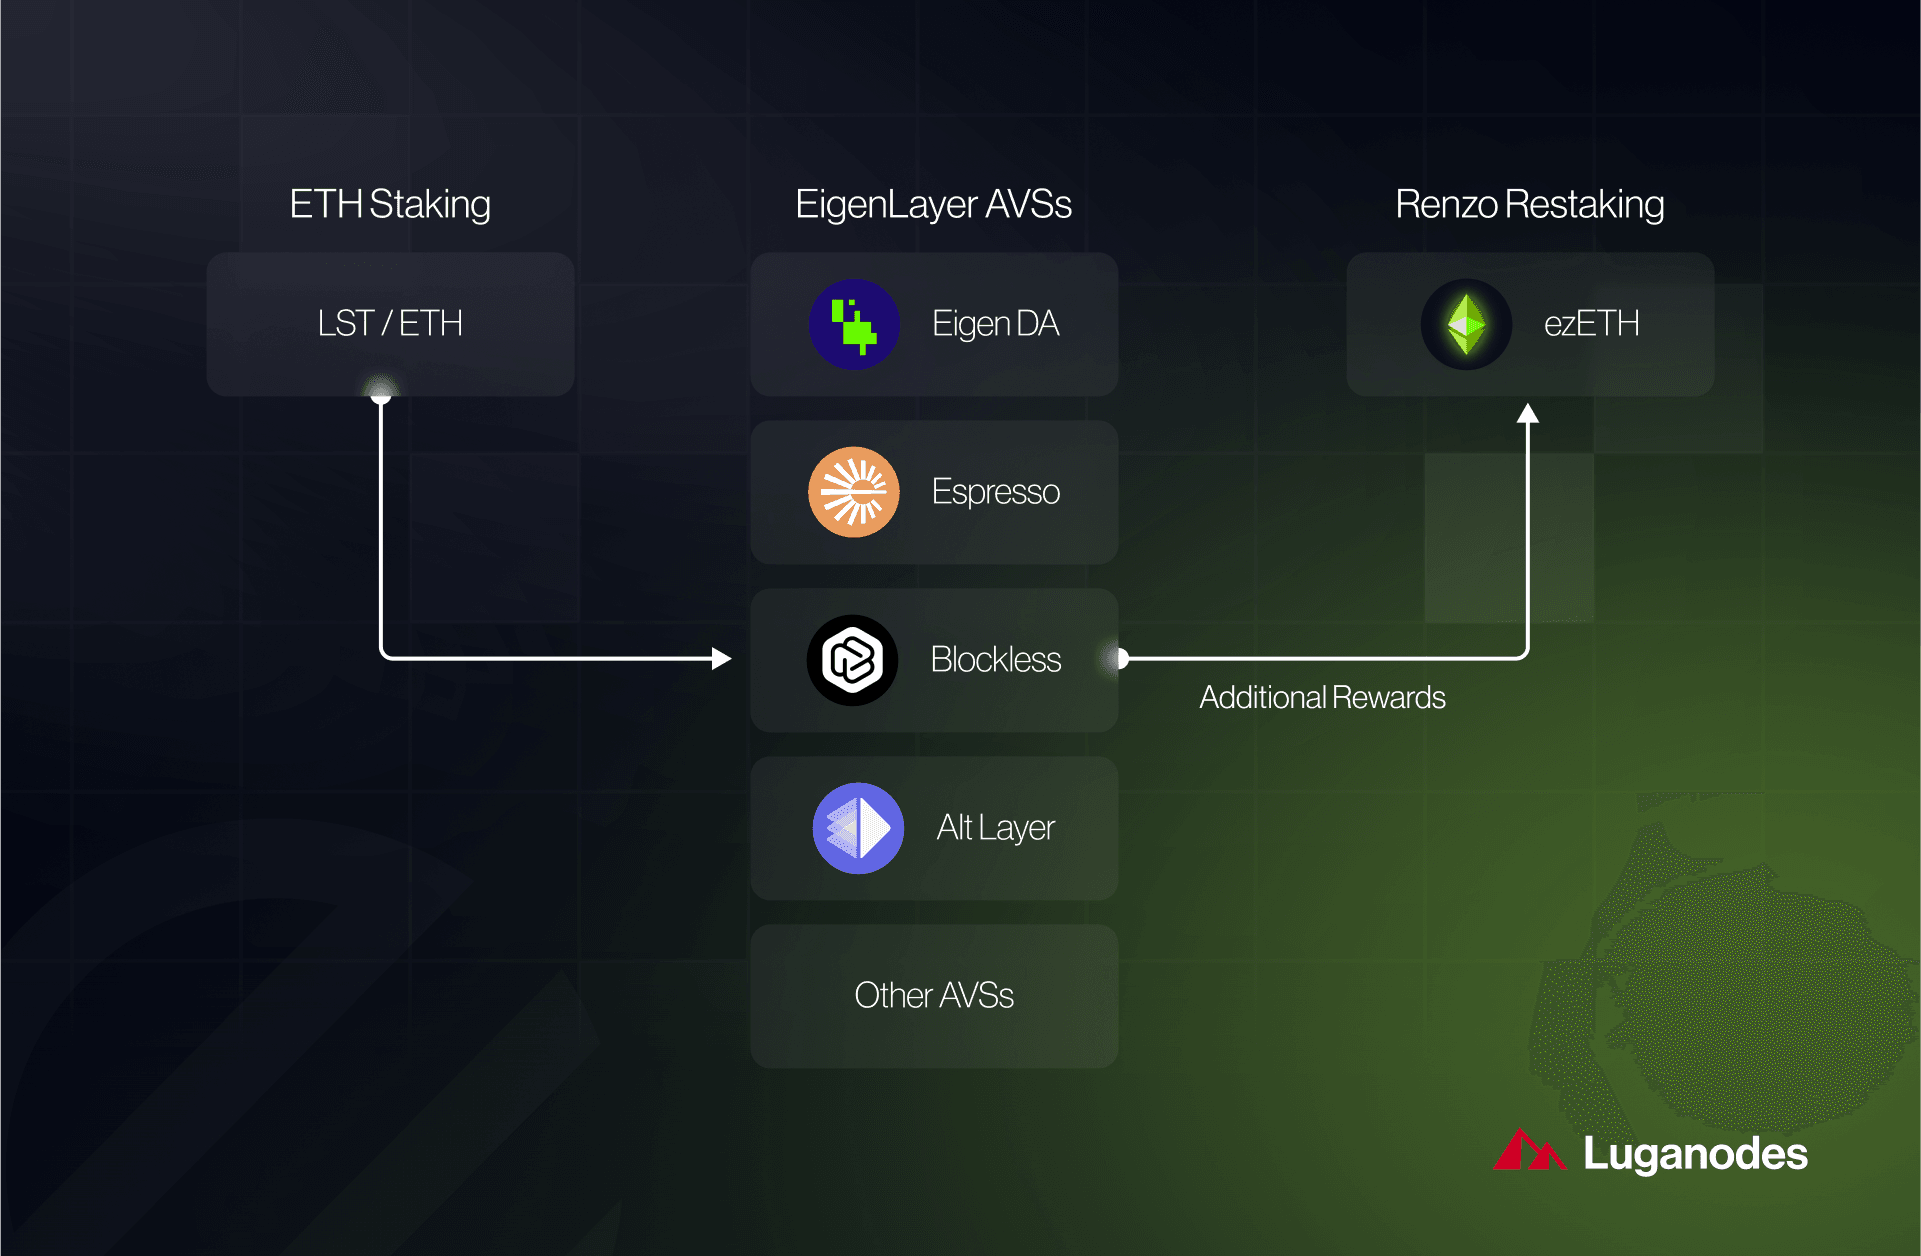
The next critical move is choosing which pool aligns with your goals. You can select from multiple AVS pools based on projected rewards, security parameters, or operator reputation. After selection:
- Select your desired LST or native ETH balance.
- Input the amount you wish to deposit.
- Confirm the transaction through your wallet interface, this will trigger an on-chain deposit into the chosen pool.
This action officially commits your assets to securing AVSs via EigenLayer’s protocol logic while tracking accrual of restaked points, which are vital for reward calculations over time.
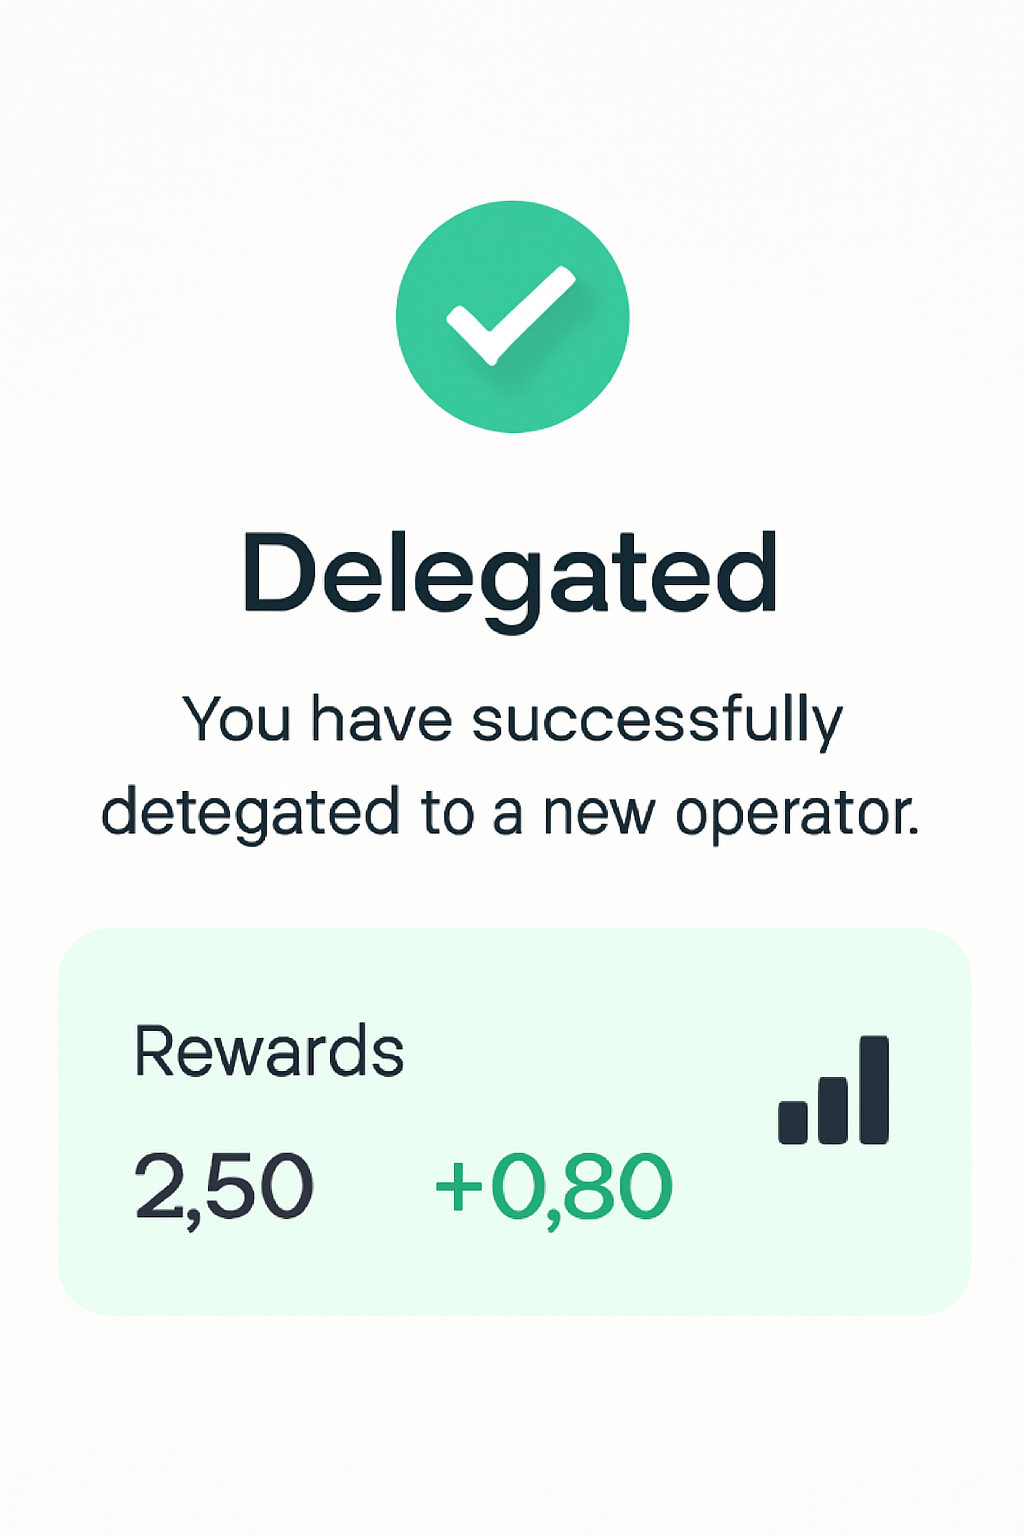
After depositing, you’ll be prompted to delegate your restaked assets to an operator. Operators are responsible for validating Actively Validated Services (AVSs) and distributing rewards. Carefully research operator performance and reputation, your choice impacts both security and yield. Operator dashboards in the EigenLayer interface provide transparency on commission rates, slashing history, and supported AVSs.
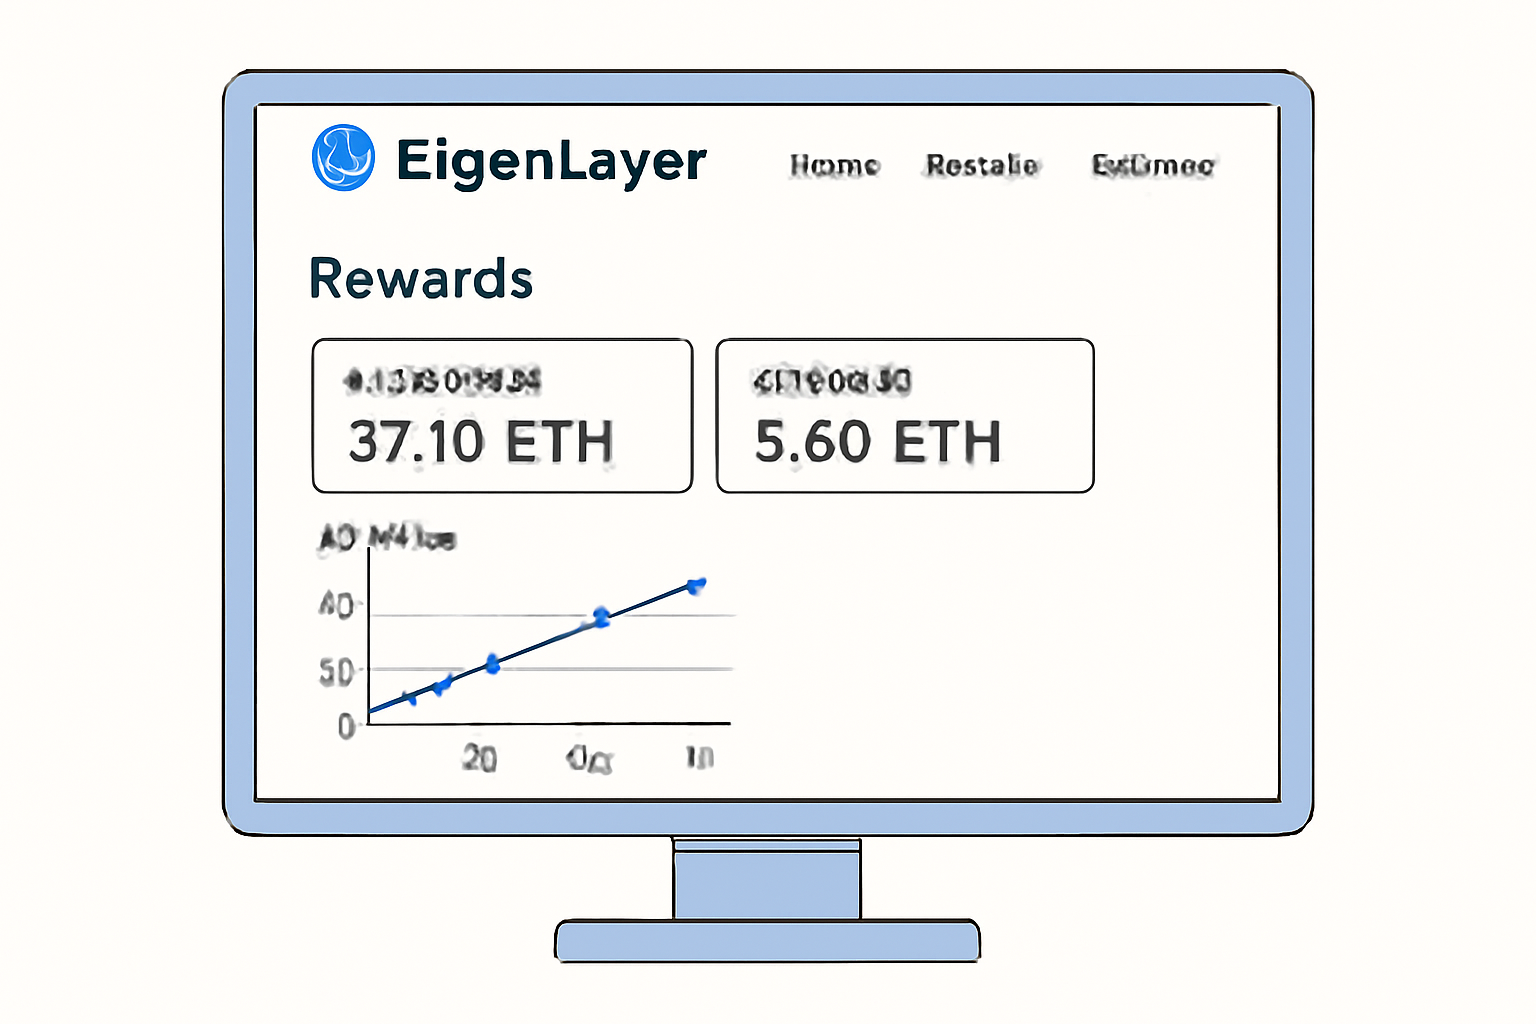
5. Monitor Rewards and Manage Restaked Assets
Ongoing management is essential for maximizing your returns in Eigenlayer restaking pools. The platform tracks your restaked points, a metric determined by the time-integrated amount of ETH or LSTs staked (measured in ETH-hours). These points are the basis for reward distribution and potential future incentives from EigenLayer or AVS protocols. Regularly review your accrued points and monitor real-time rewards via the platform dashboard.
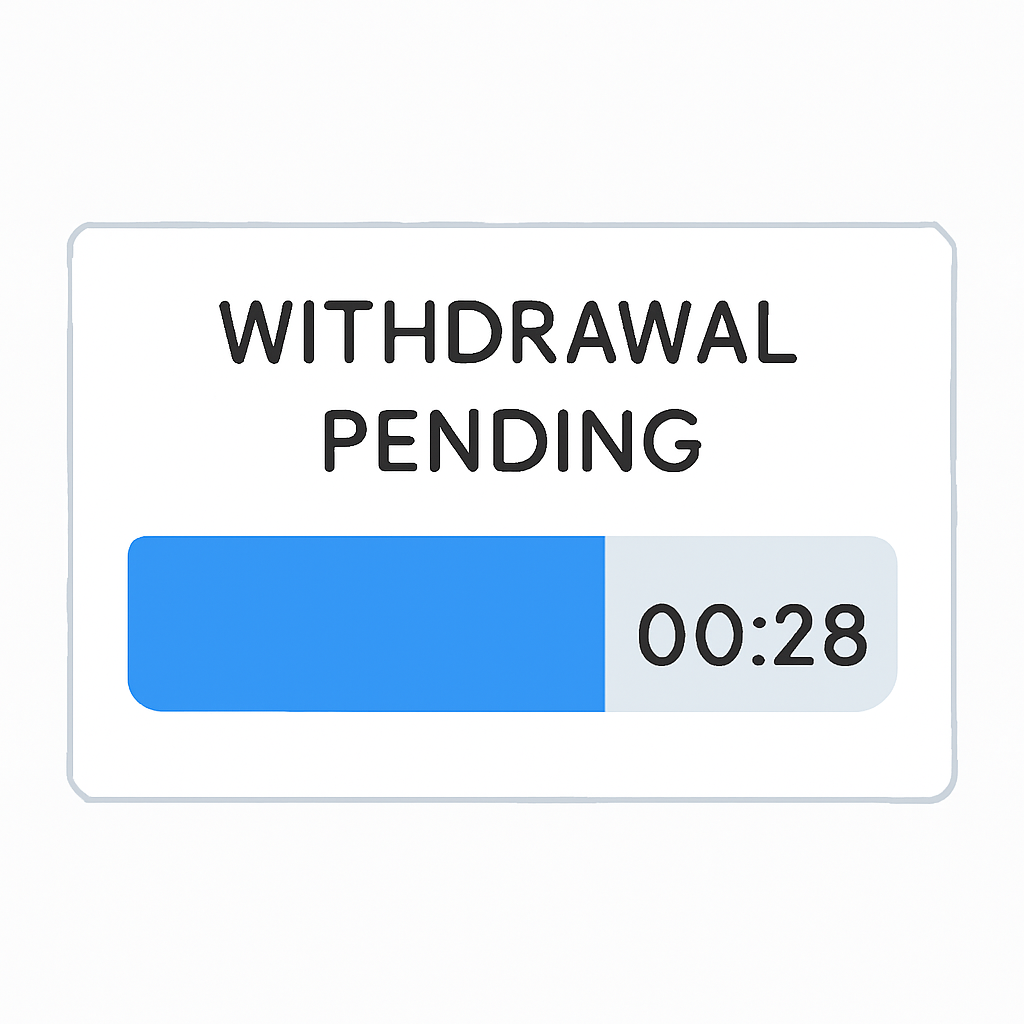
Withdrawal flexibility comes with a tradeoff: EigenLayer enforces a 7-day withdrawal delay on all restaked assets, both liquid and native. This security feature mitigates risks to AVSs but requires participants to plan liquidity needs accordingly. Initiate withdrawals directly from the EigenLayer app; after the delay period, tokens become available in your wallet.
Strategies for Optimizing Your Restaking Rewards
To get the most out of Eigenlayer restaking pools, consider these proven strategies:
- Diversify across multiple AVS pools: Allocate assets based on risk profile and projected rewards.
- Monitor operator performance: Re-delegate if an operator underperforms or increases fees.
- Track restaked points accumulation: Longer staking periods with higher balances lead to more points, and higher rewards.
- Stay updated on protocol changes: New AVSs or reward mechanisms can shift optimal strategies quickly.
Managing Rewards and Withdrawals in EigenLayer Restaking

The rapid evolution of Ethereum’s staking ecosystem means that new opportunities, and risks, emerge regularly. Participating in Eigenlayer restaking pools not only boosts your earning potential but also strengthens network security by supporting diverse AVSs. As always, balance reward chasing with prudent risk management: use hardware wallets where possible, avoid overexposure to unproven operators, and stay plugged into community updates for the latest protocol developments.
If you’re looking for a data-driven edge in DeFi staking or want to contribute more deeply to Ethereum’s decentralized infrastructure, mastering these five steps will put you ahead of the curve. For further technical details or troubleshooting tips, check out community forums or official documentation linked within the platform interface.


No comments yet. Be the first to share your thoughts!